Learning Violin - How To Hold the Violin the Right Way

Bad example of how to hold the violin. Don't hold the violin in the center of your body. Angle it off to the left side of your body.

Bad example. Don't hold your violin too high.
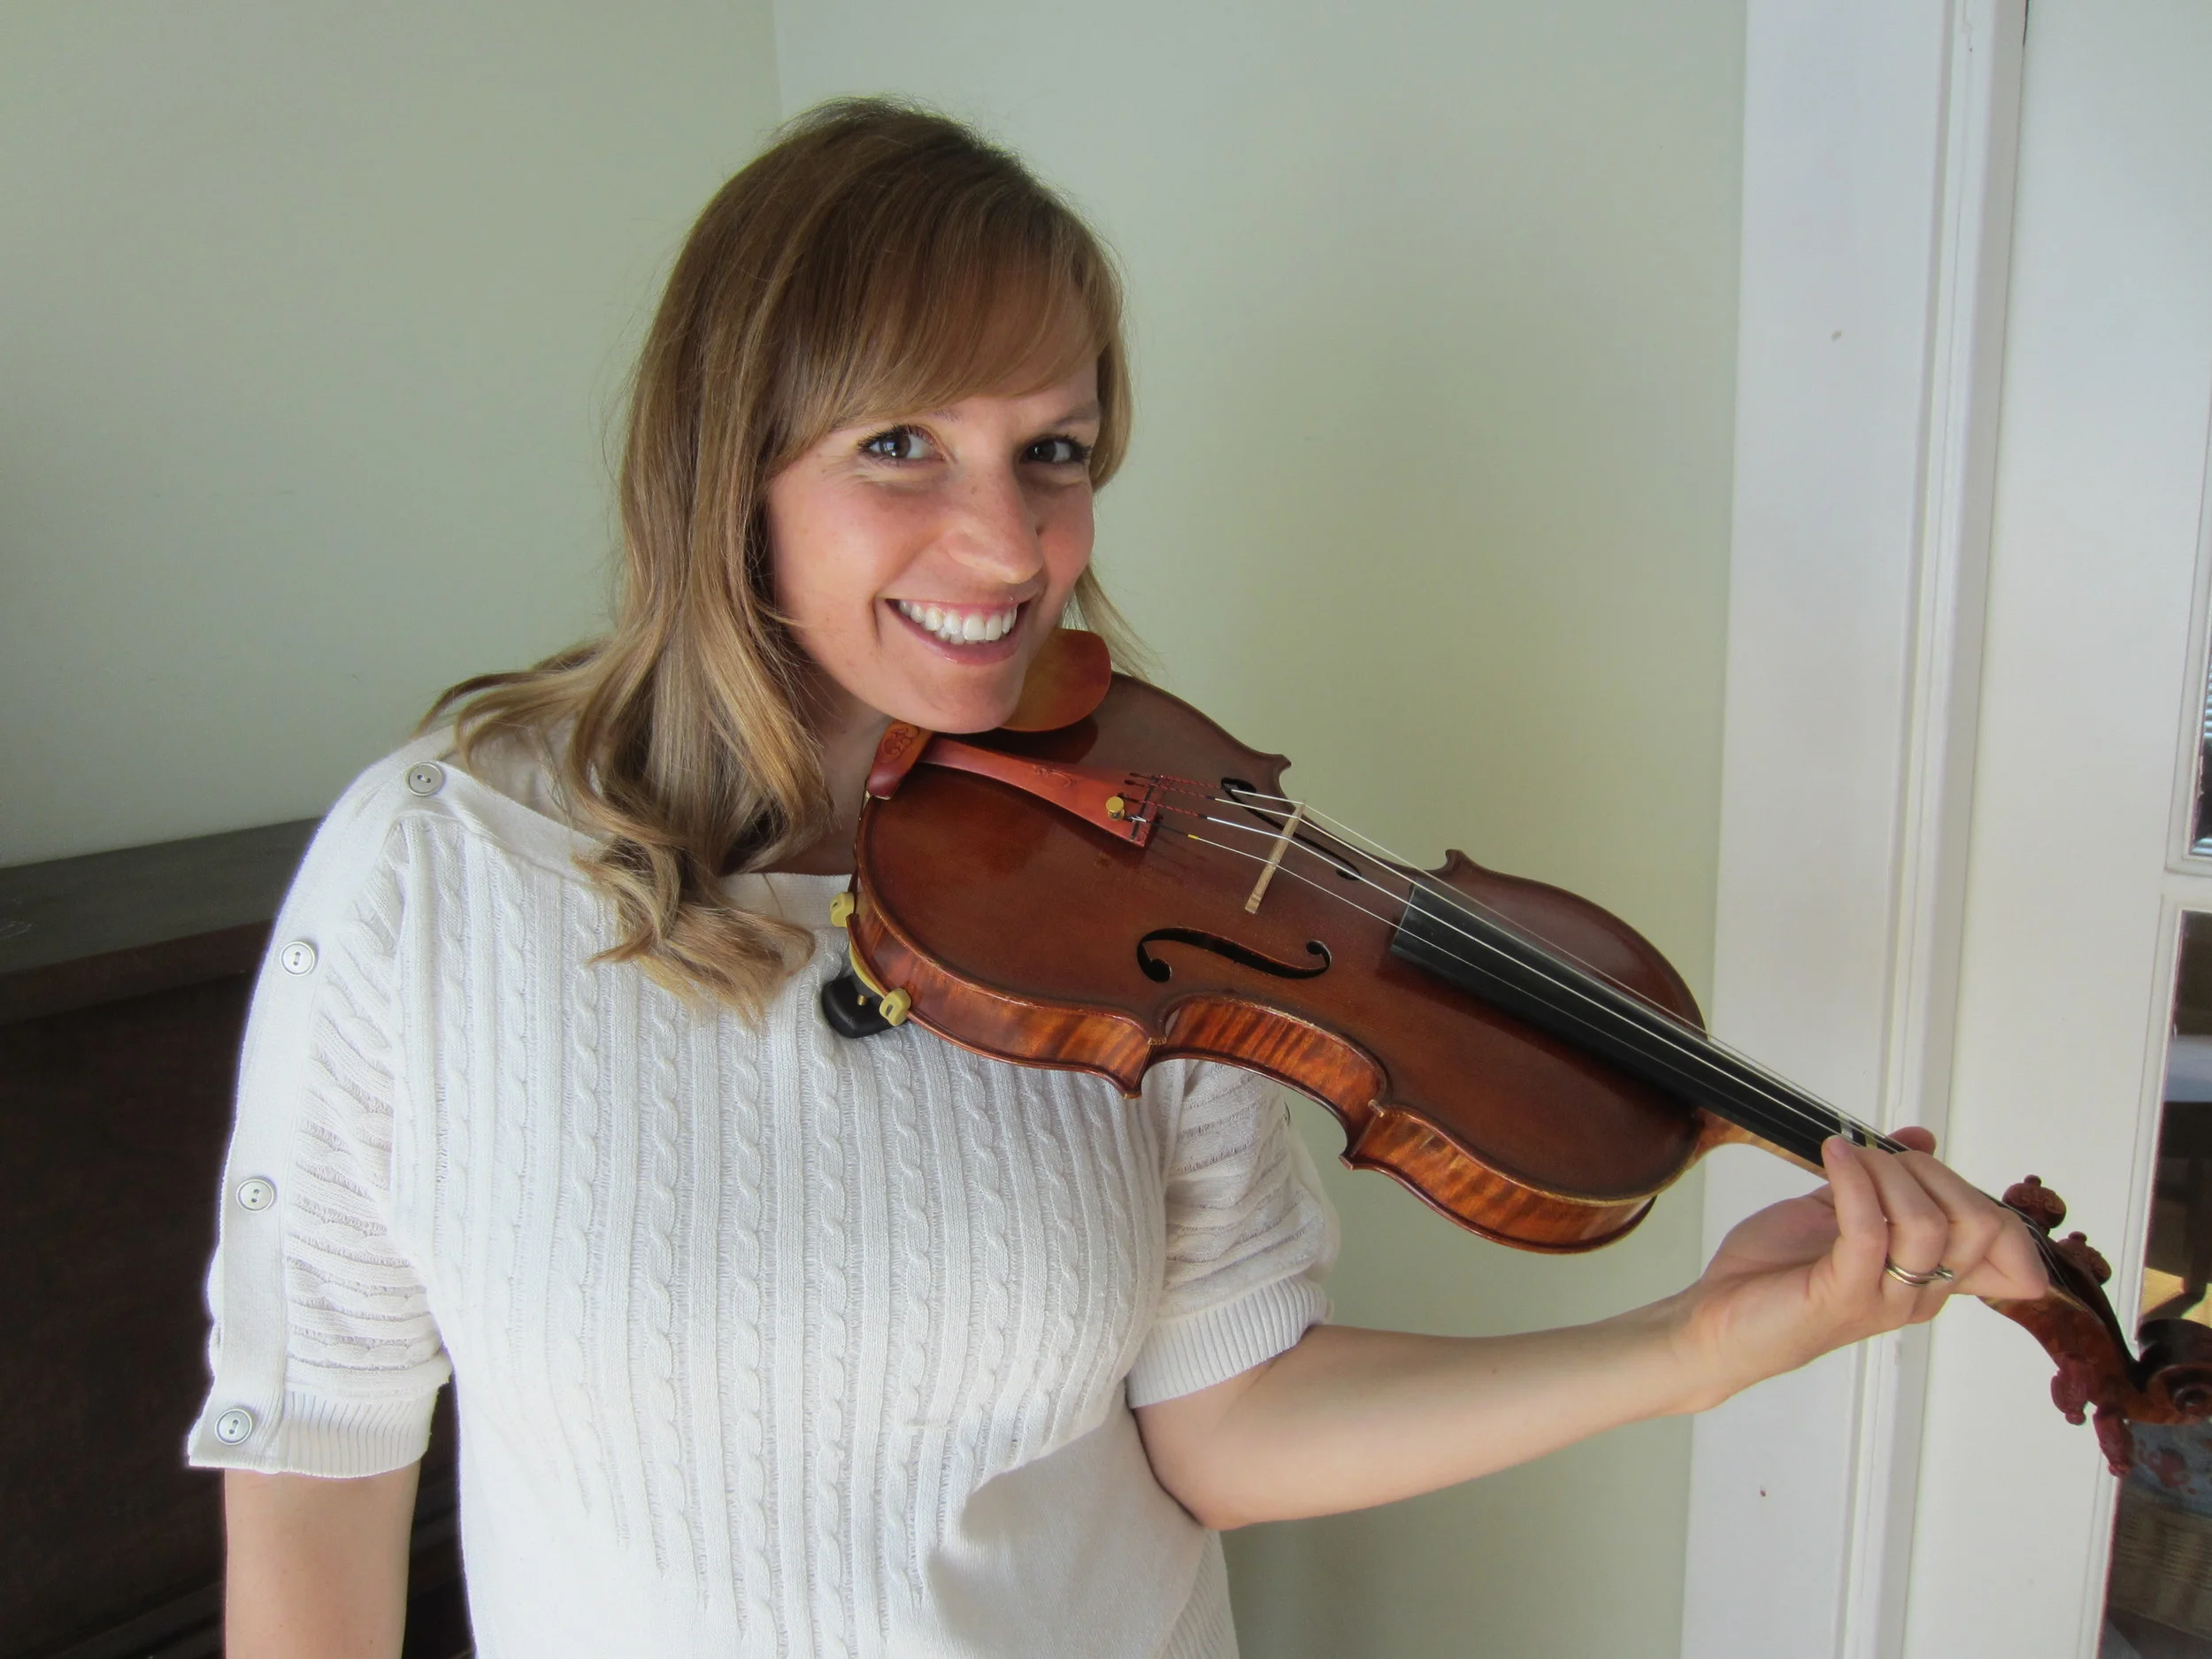
Bad example. Don't let your violin droop, your elbow should not touch your body!

Good example. This picture demonstrates the perfect height and angle of the violin. How many triangle's can you spot?
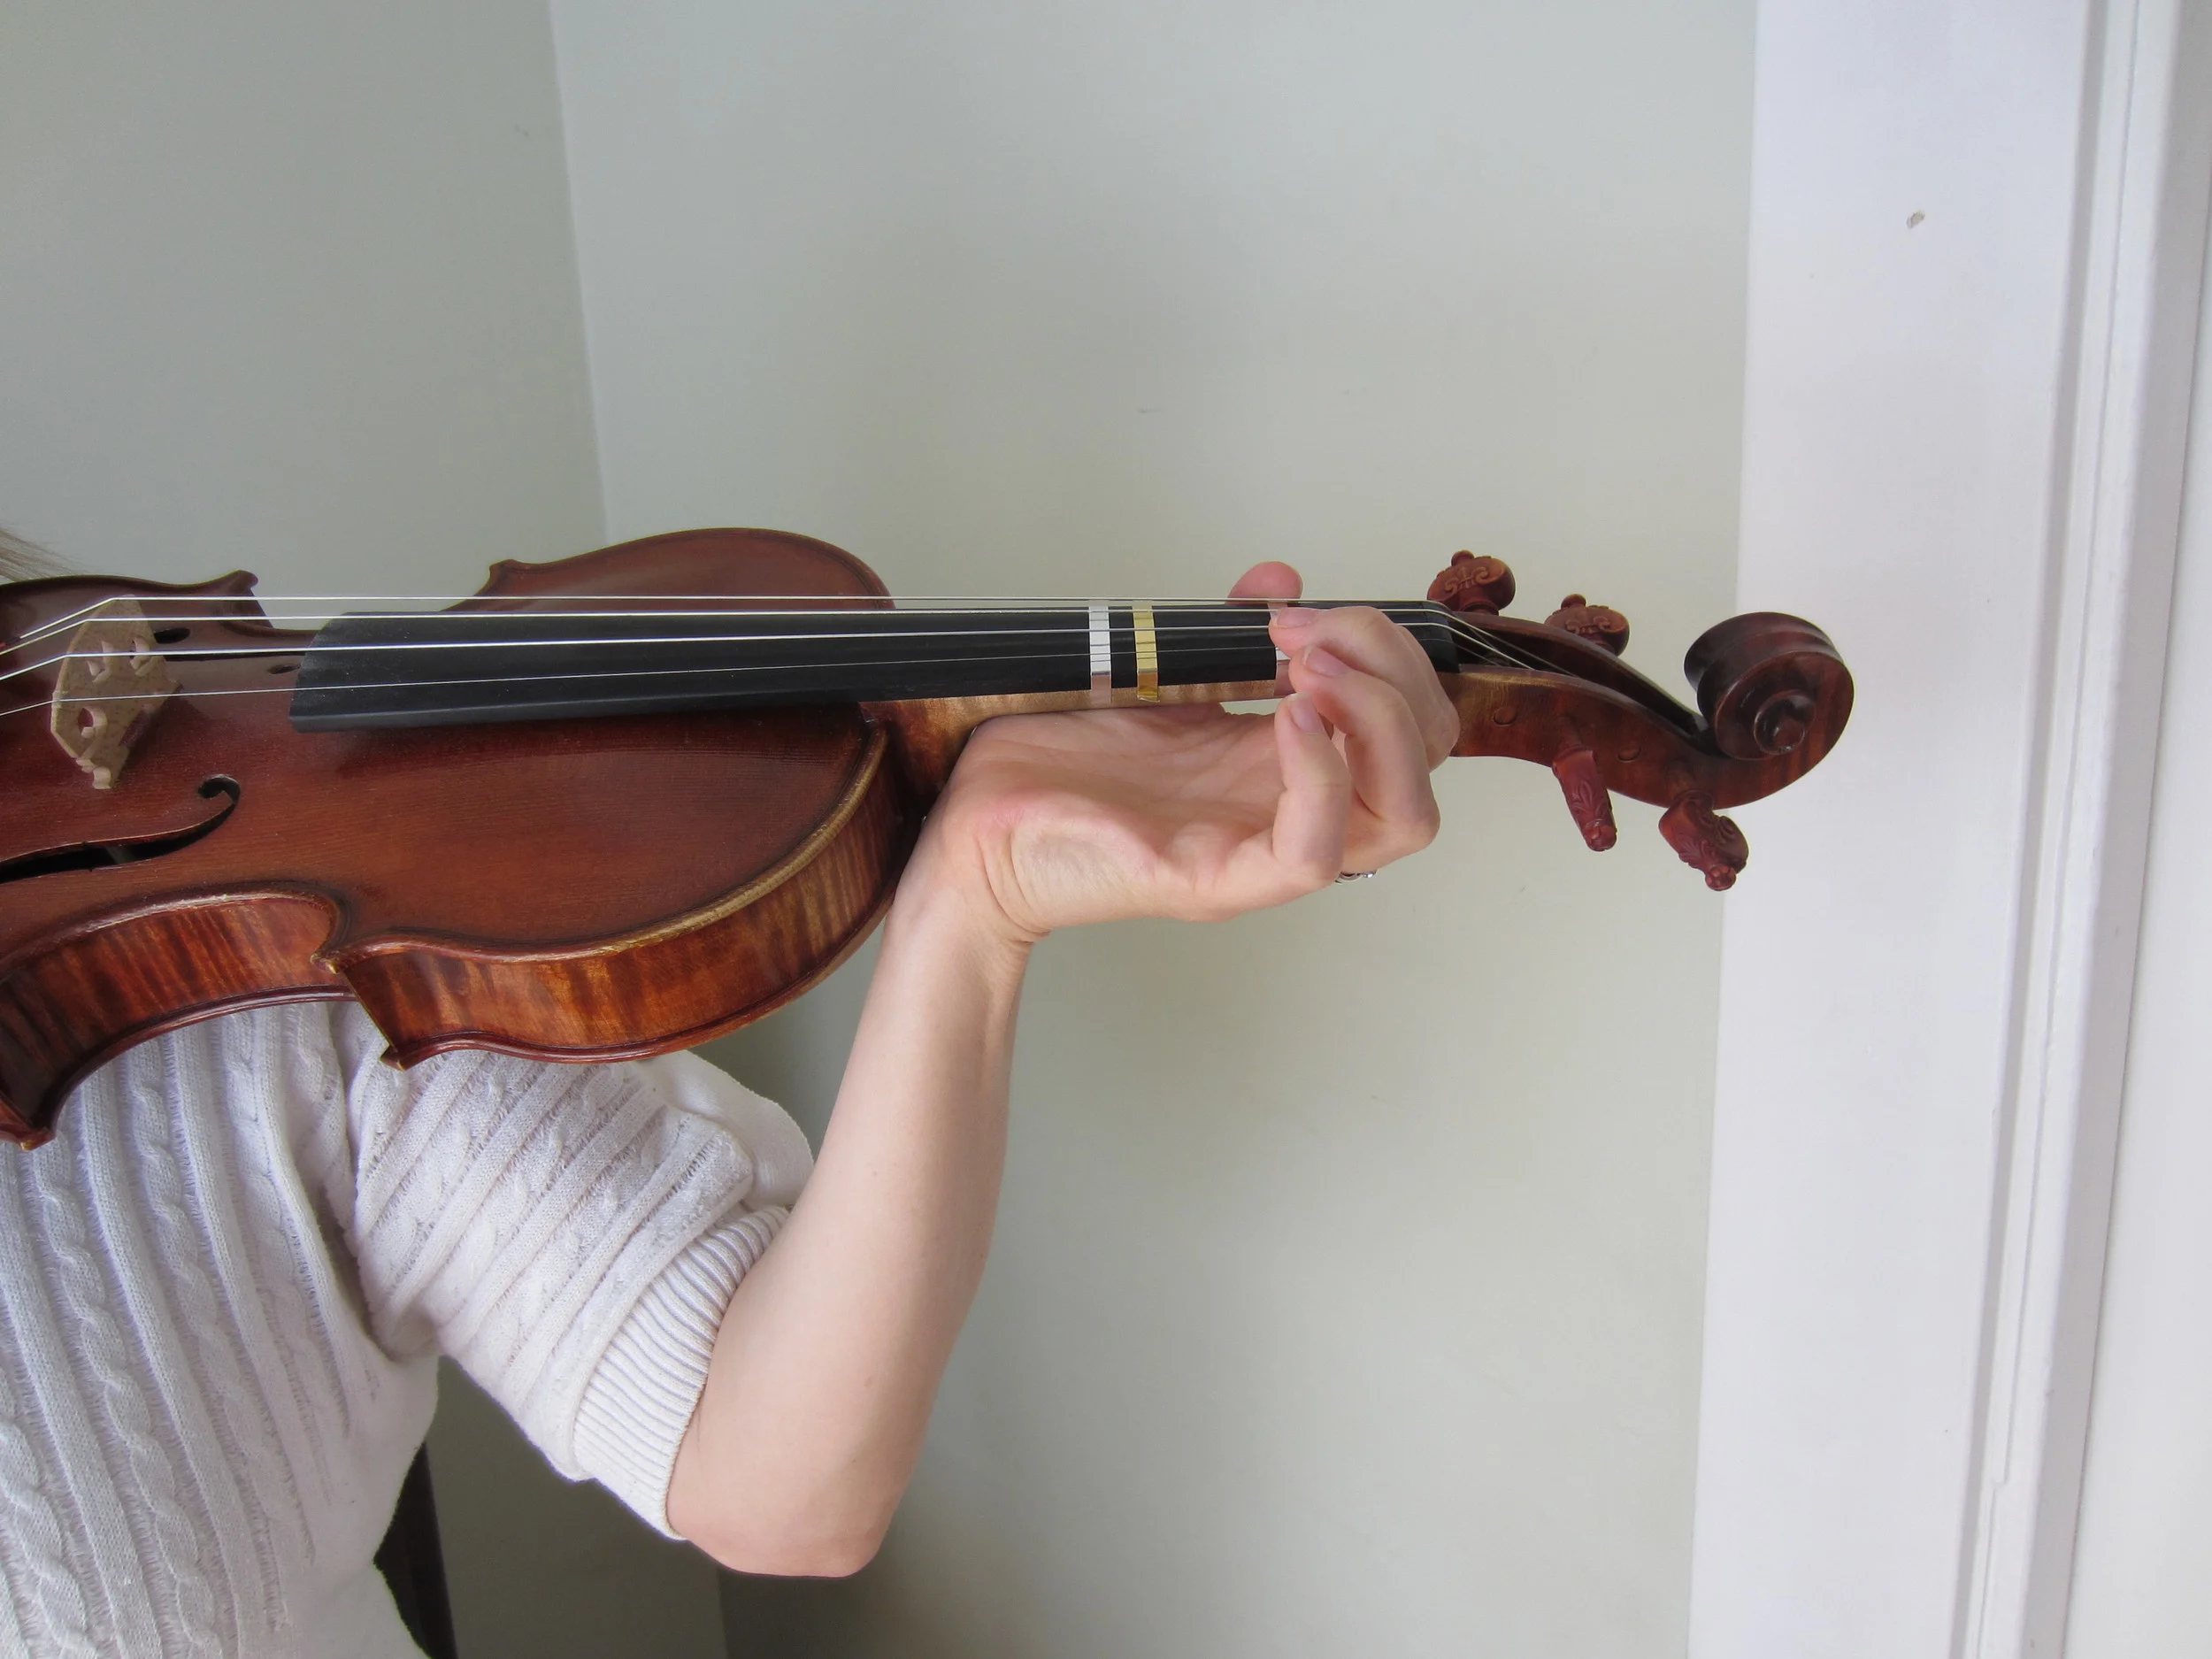
Bad example. Do not let your wrist collapse into the violin.
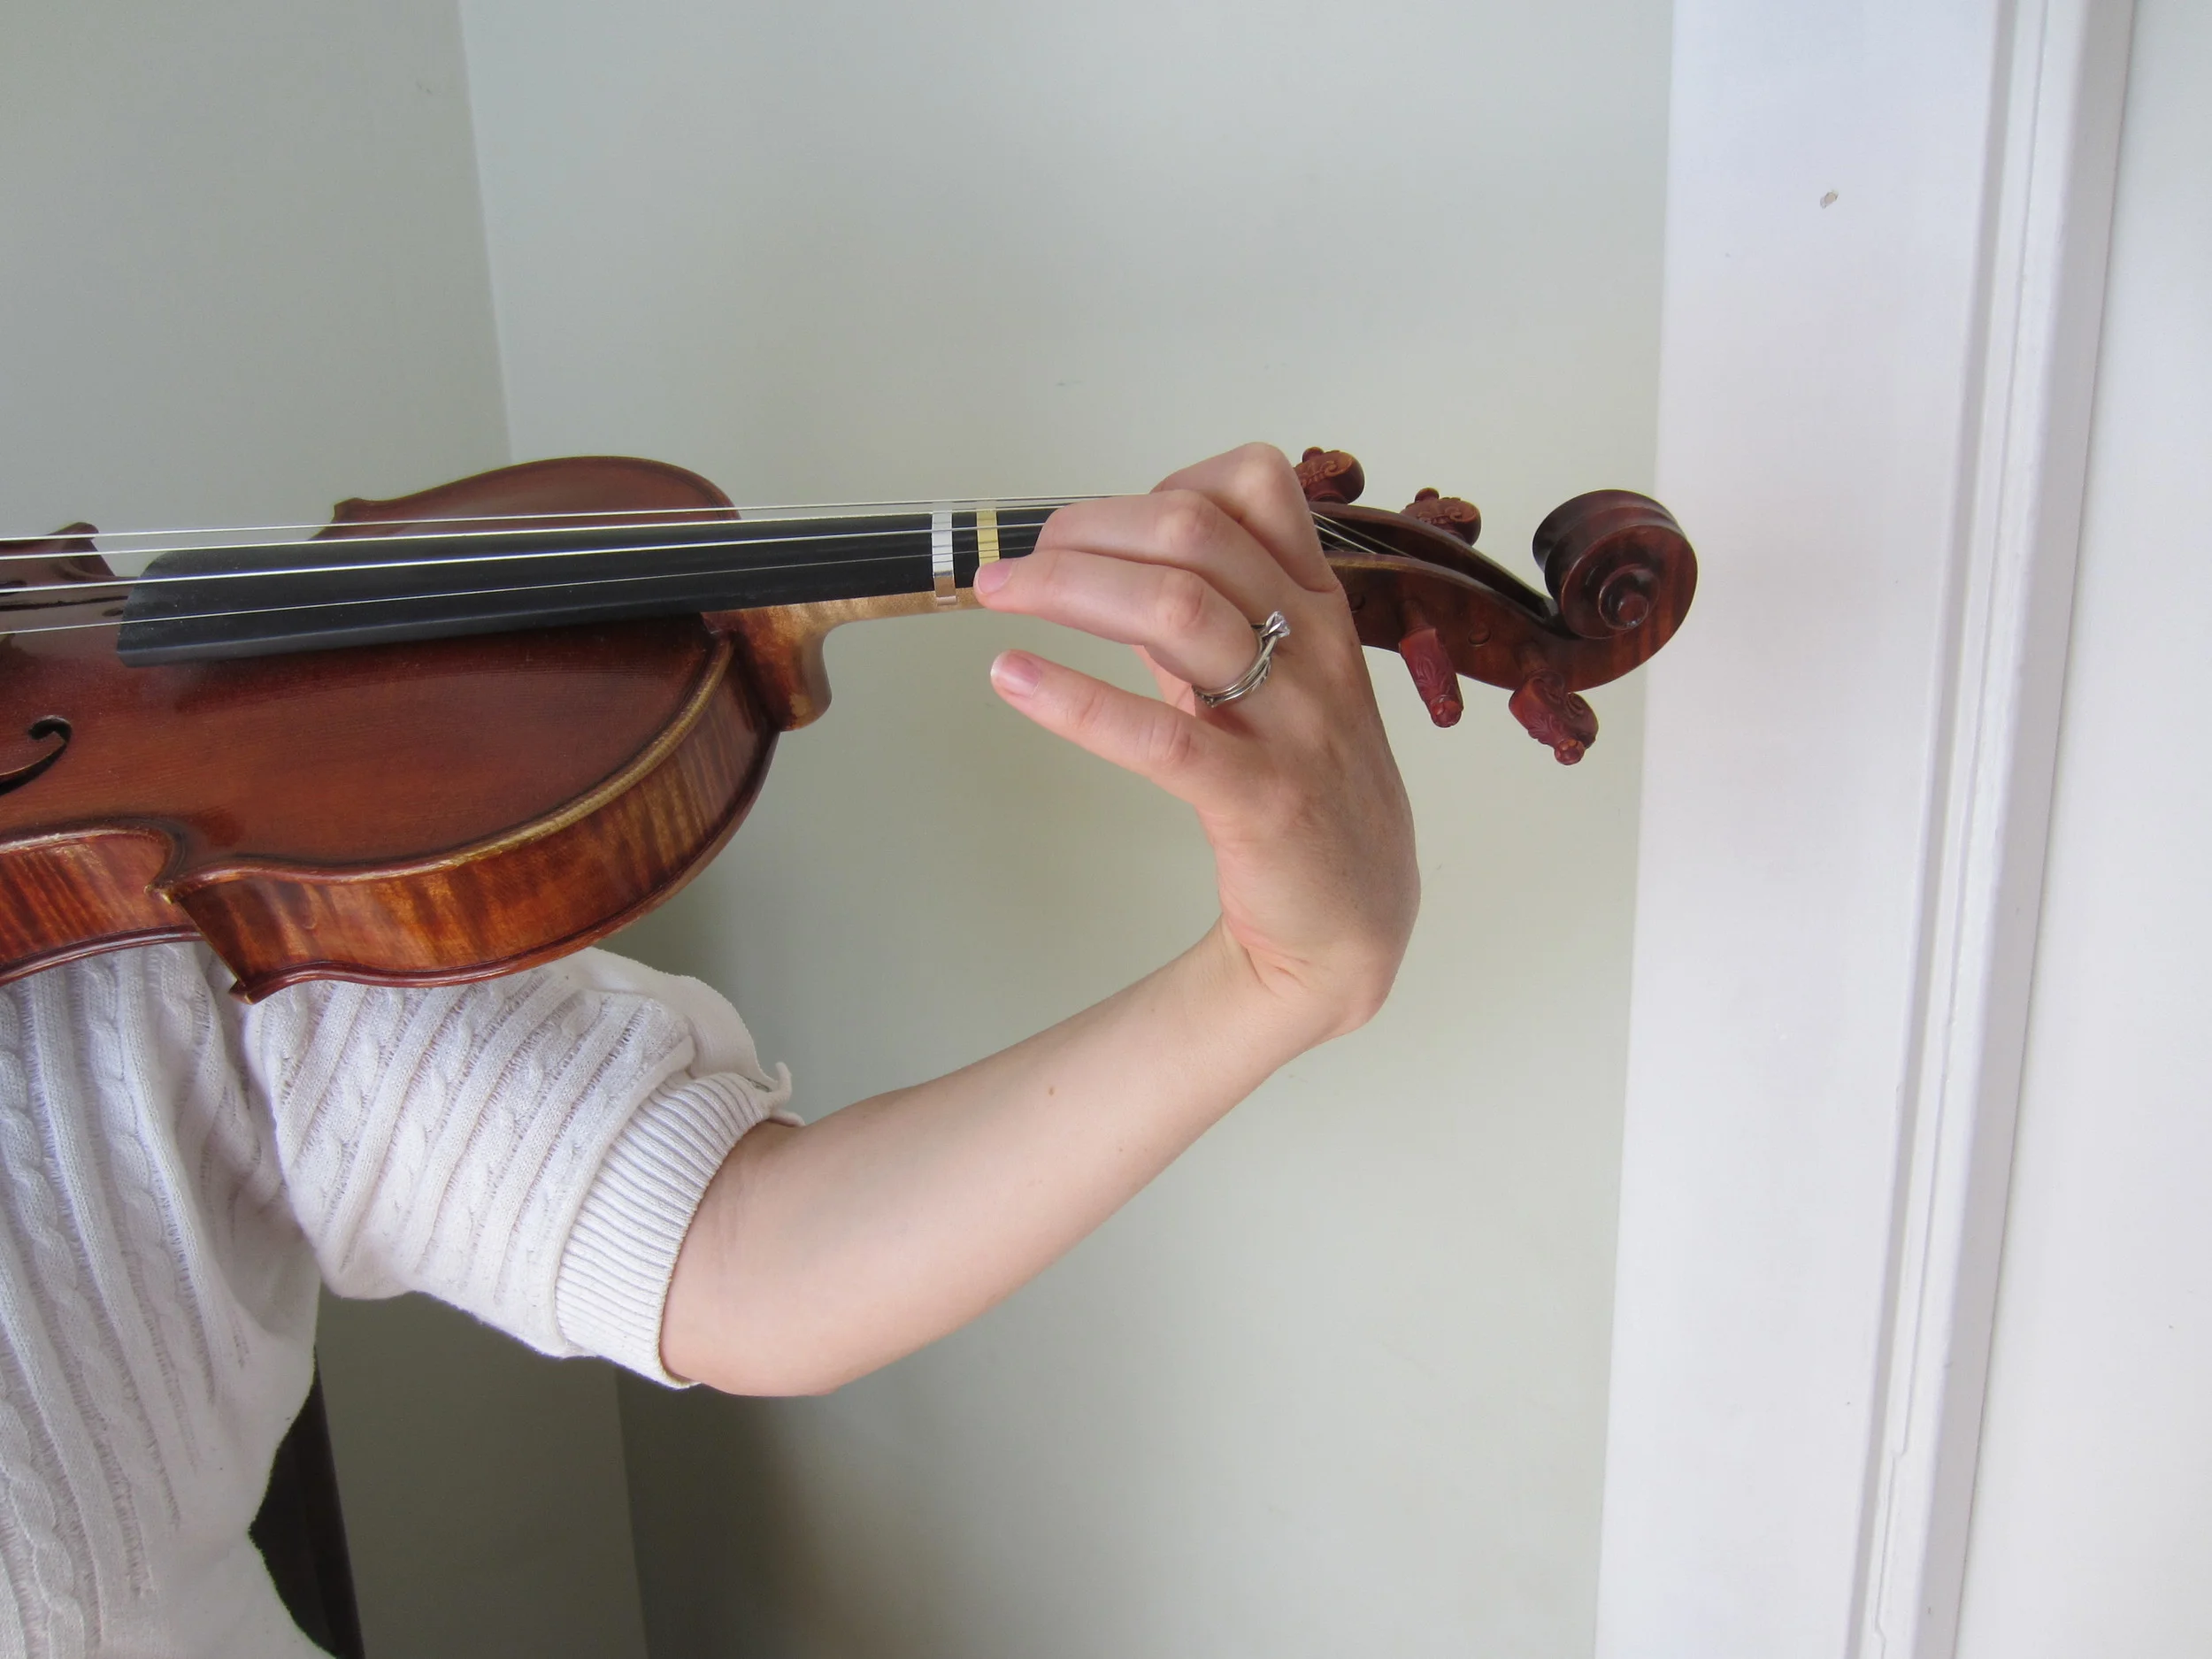
Bad example. Do not push your wrist out.
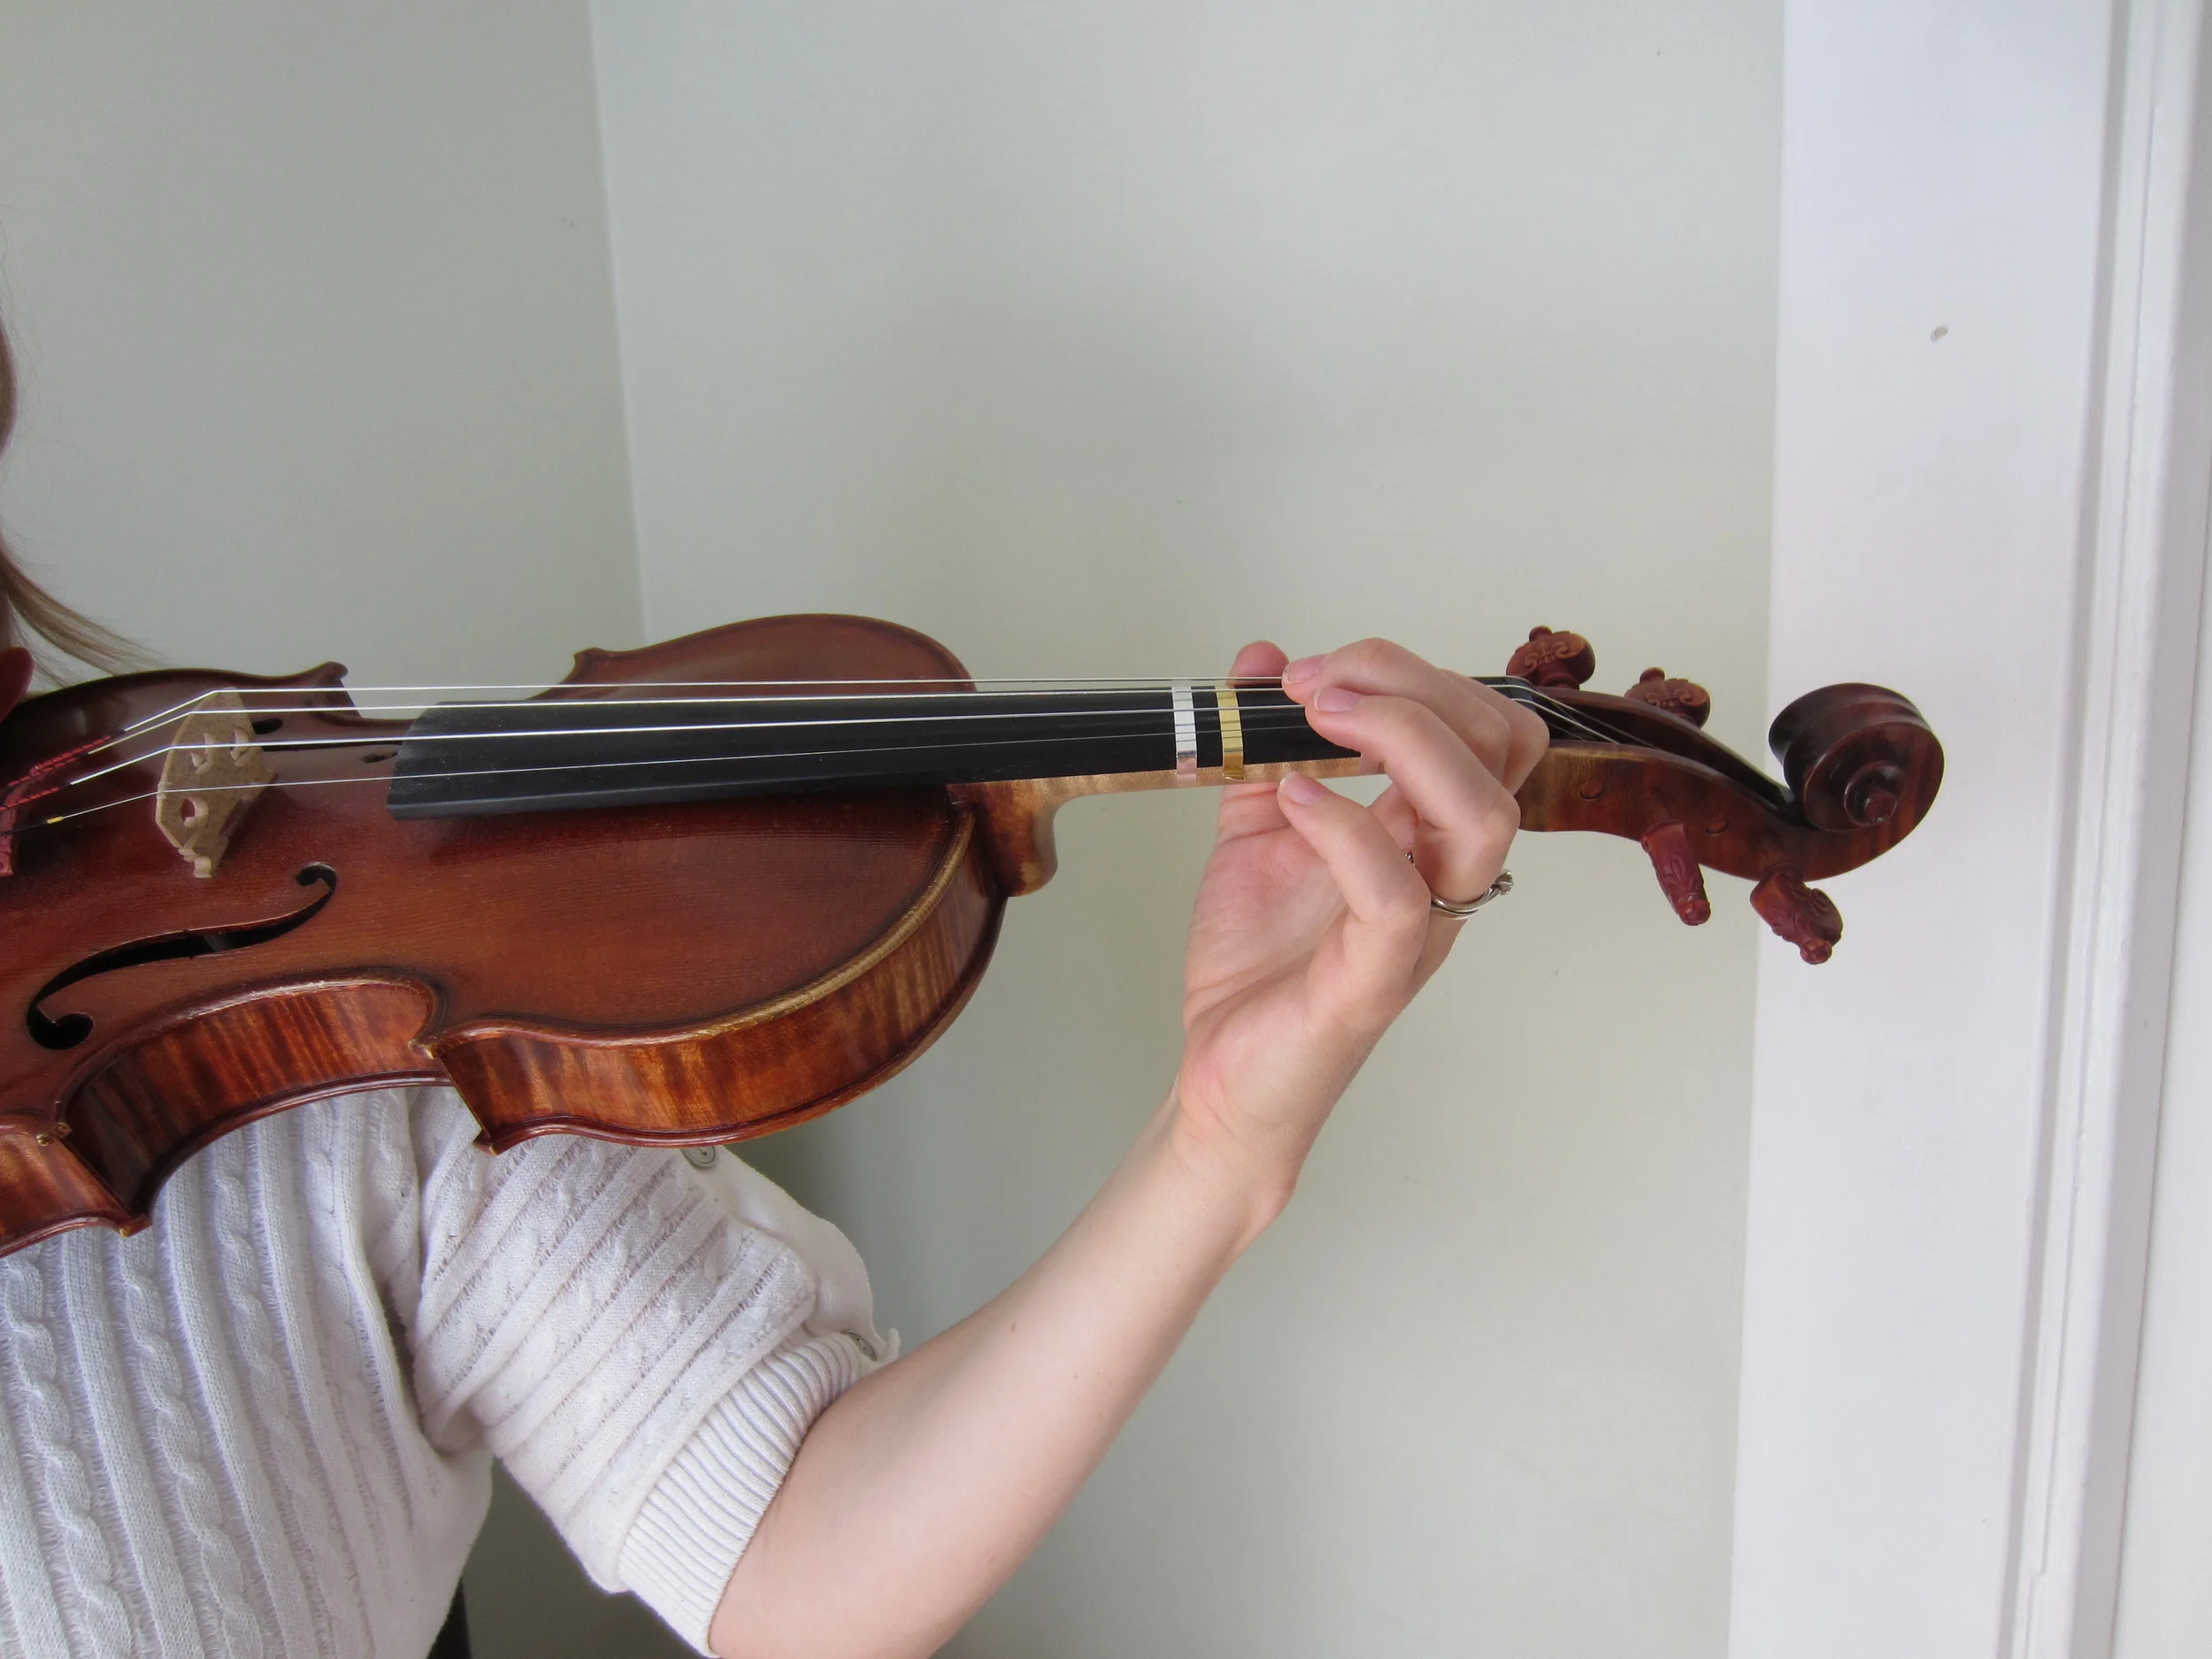
Good example. Keep your wrist in a neutral, relaxed position.
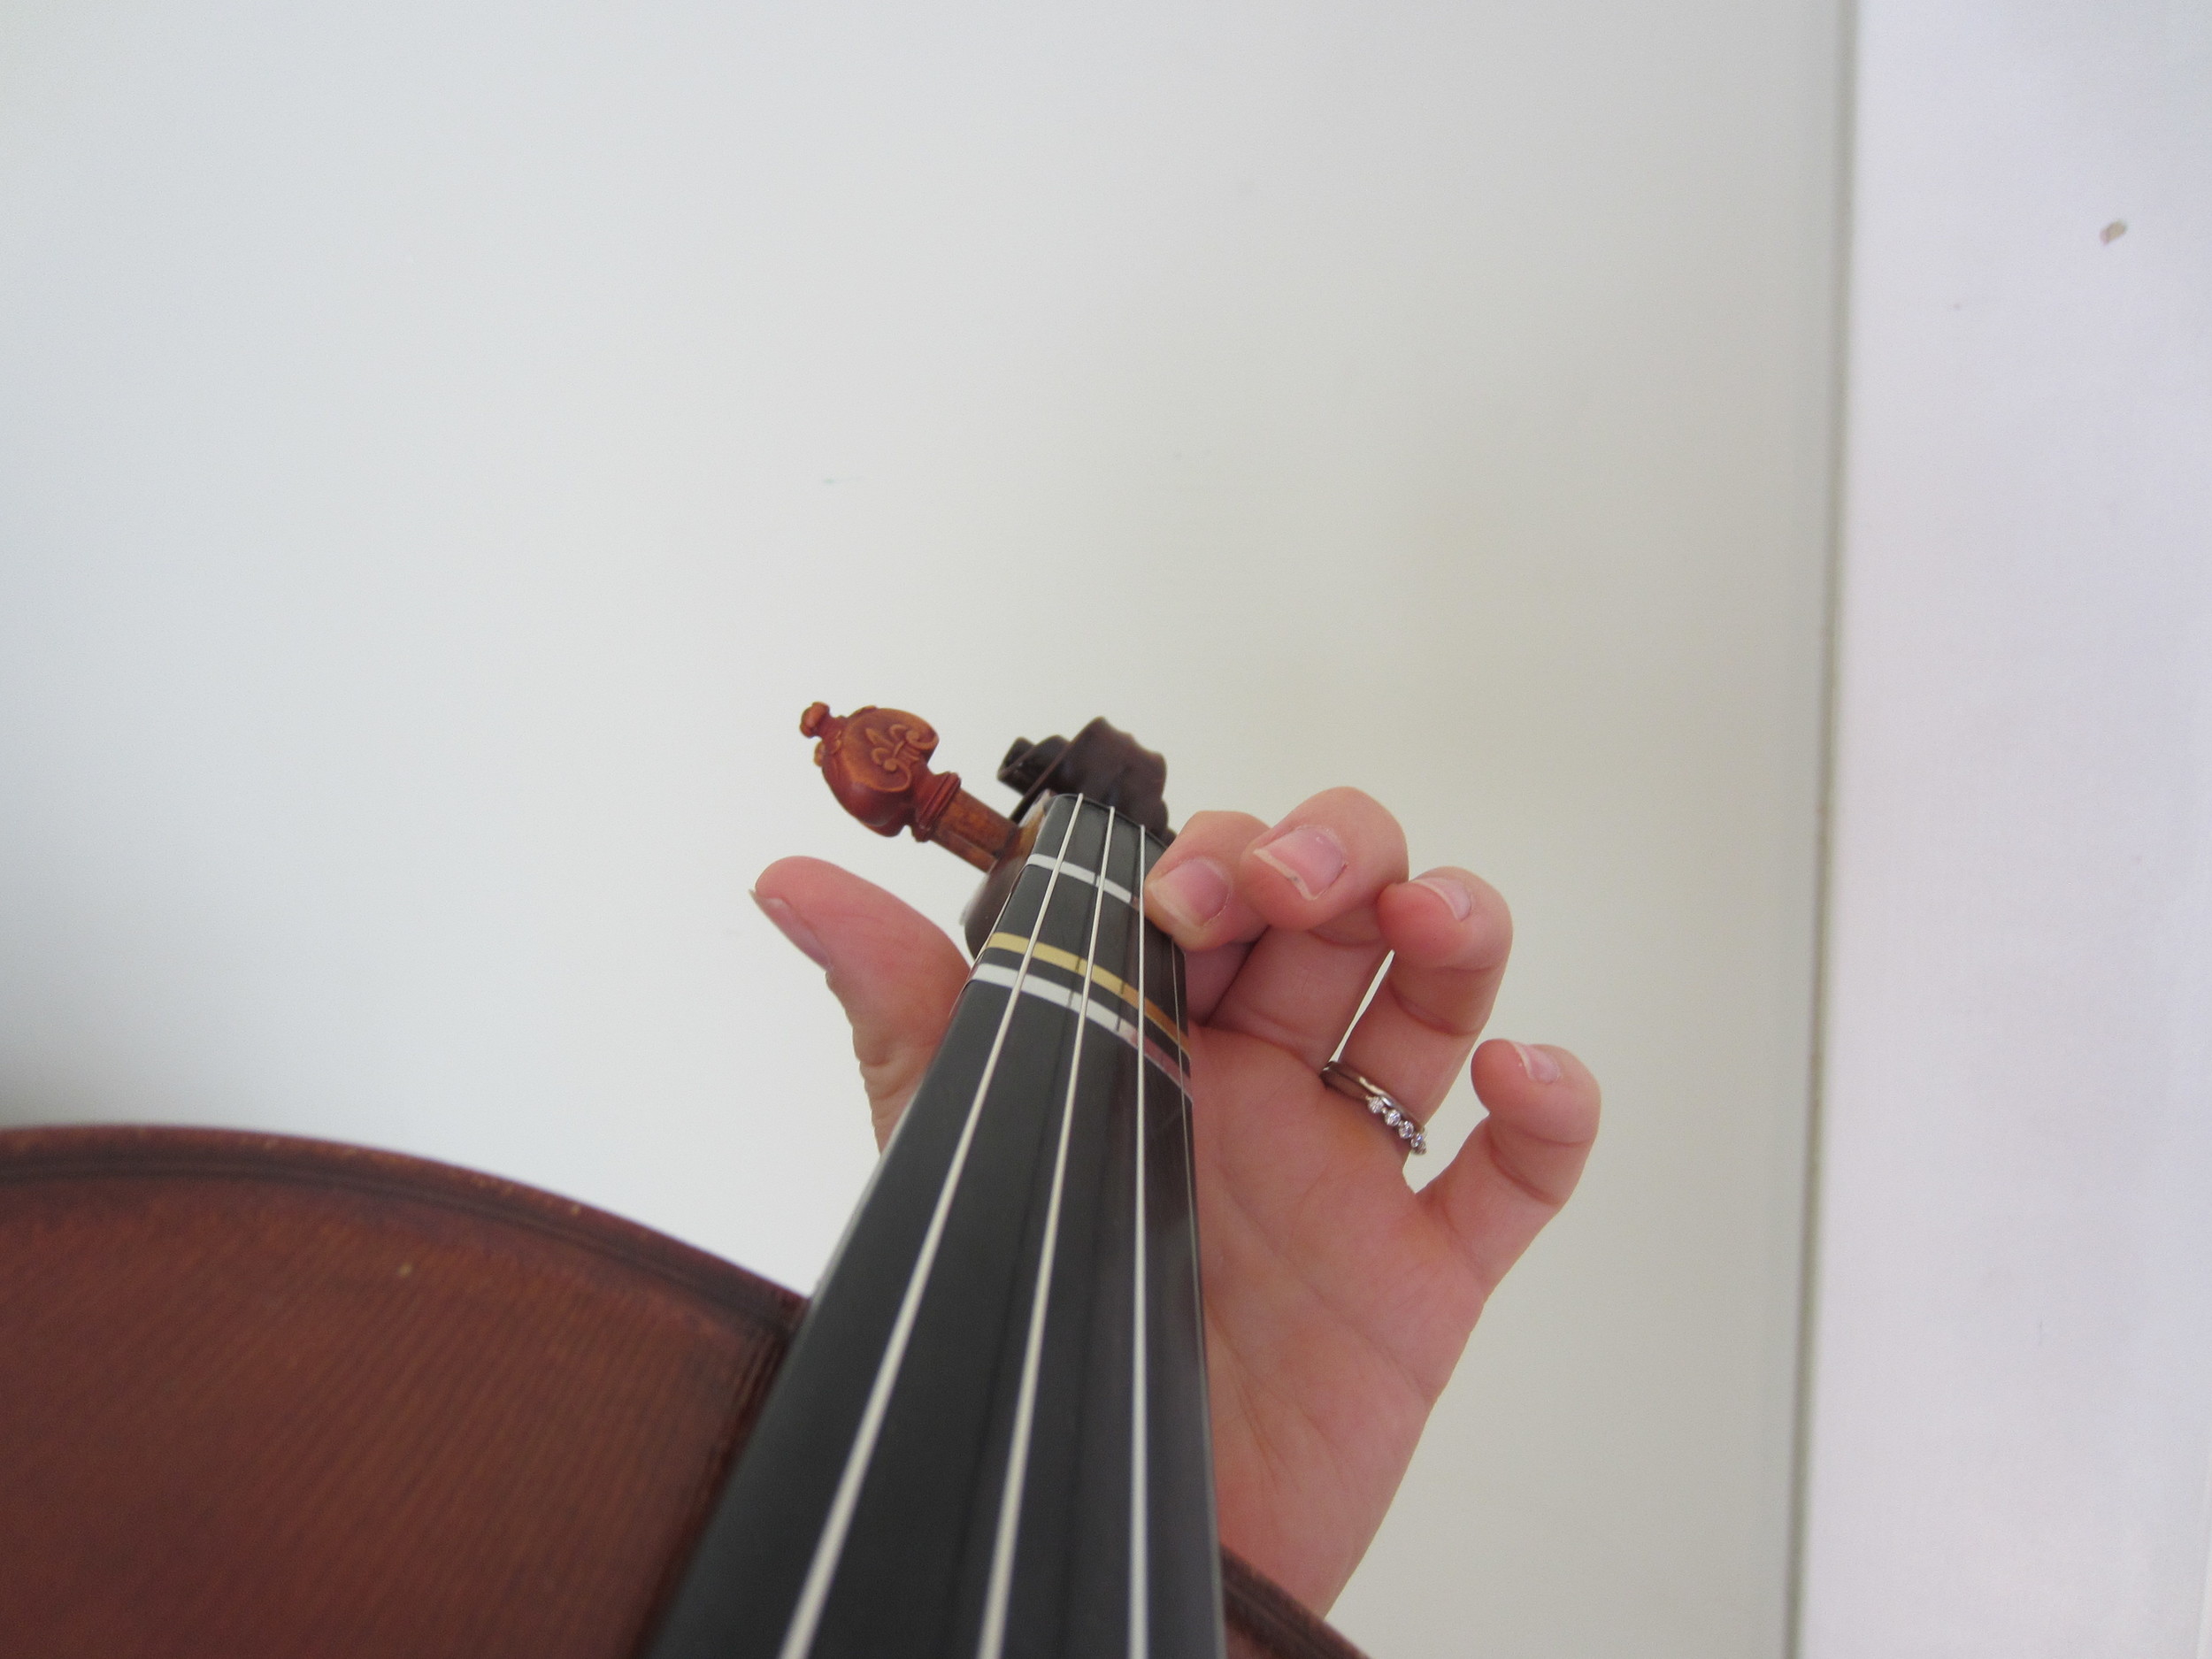
Bad example. Do not hyperflex your thumb.
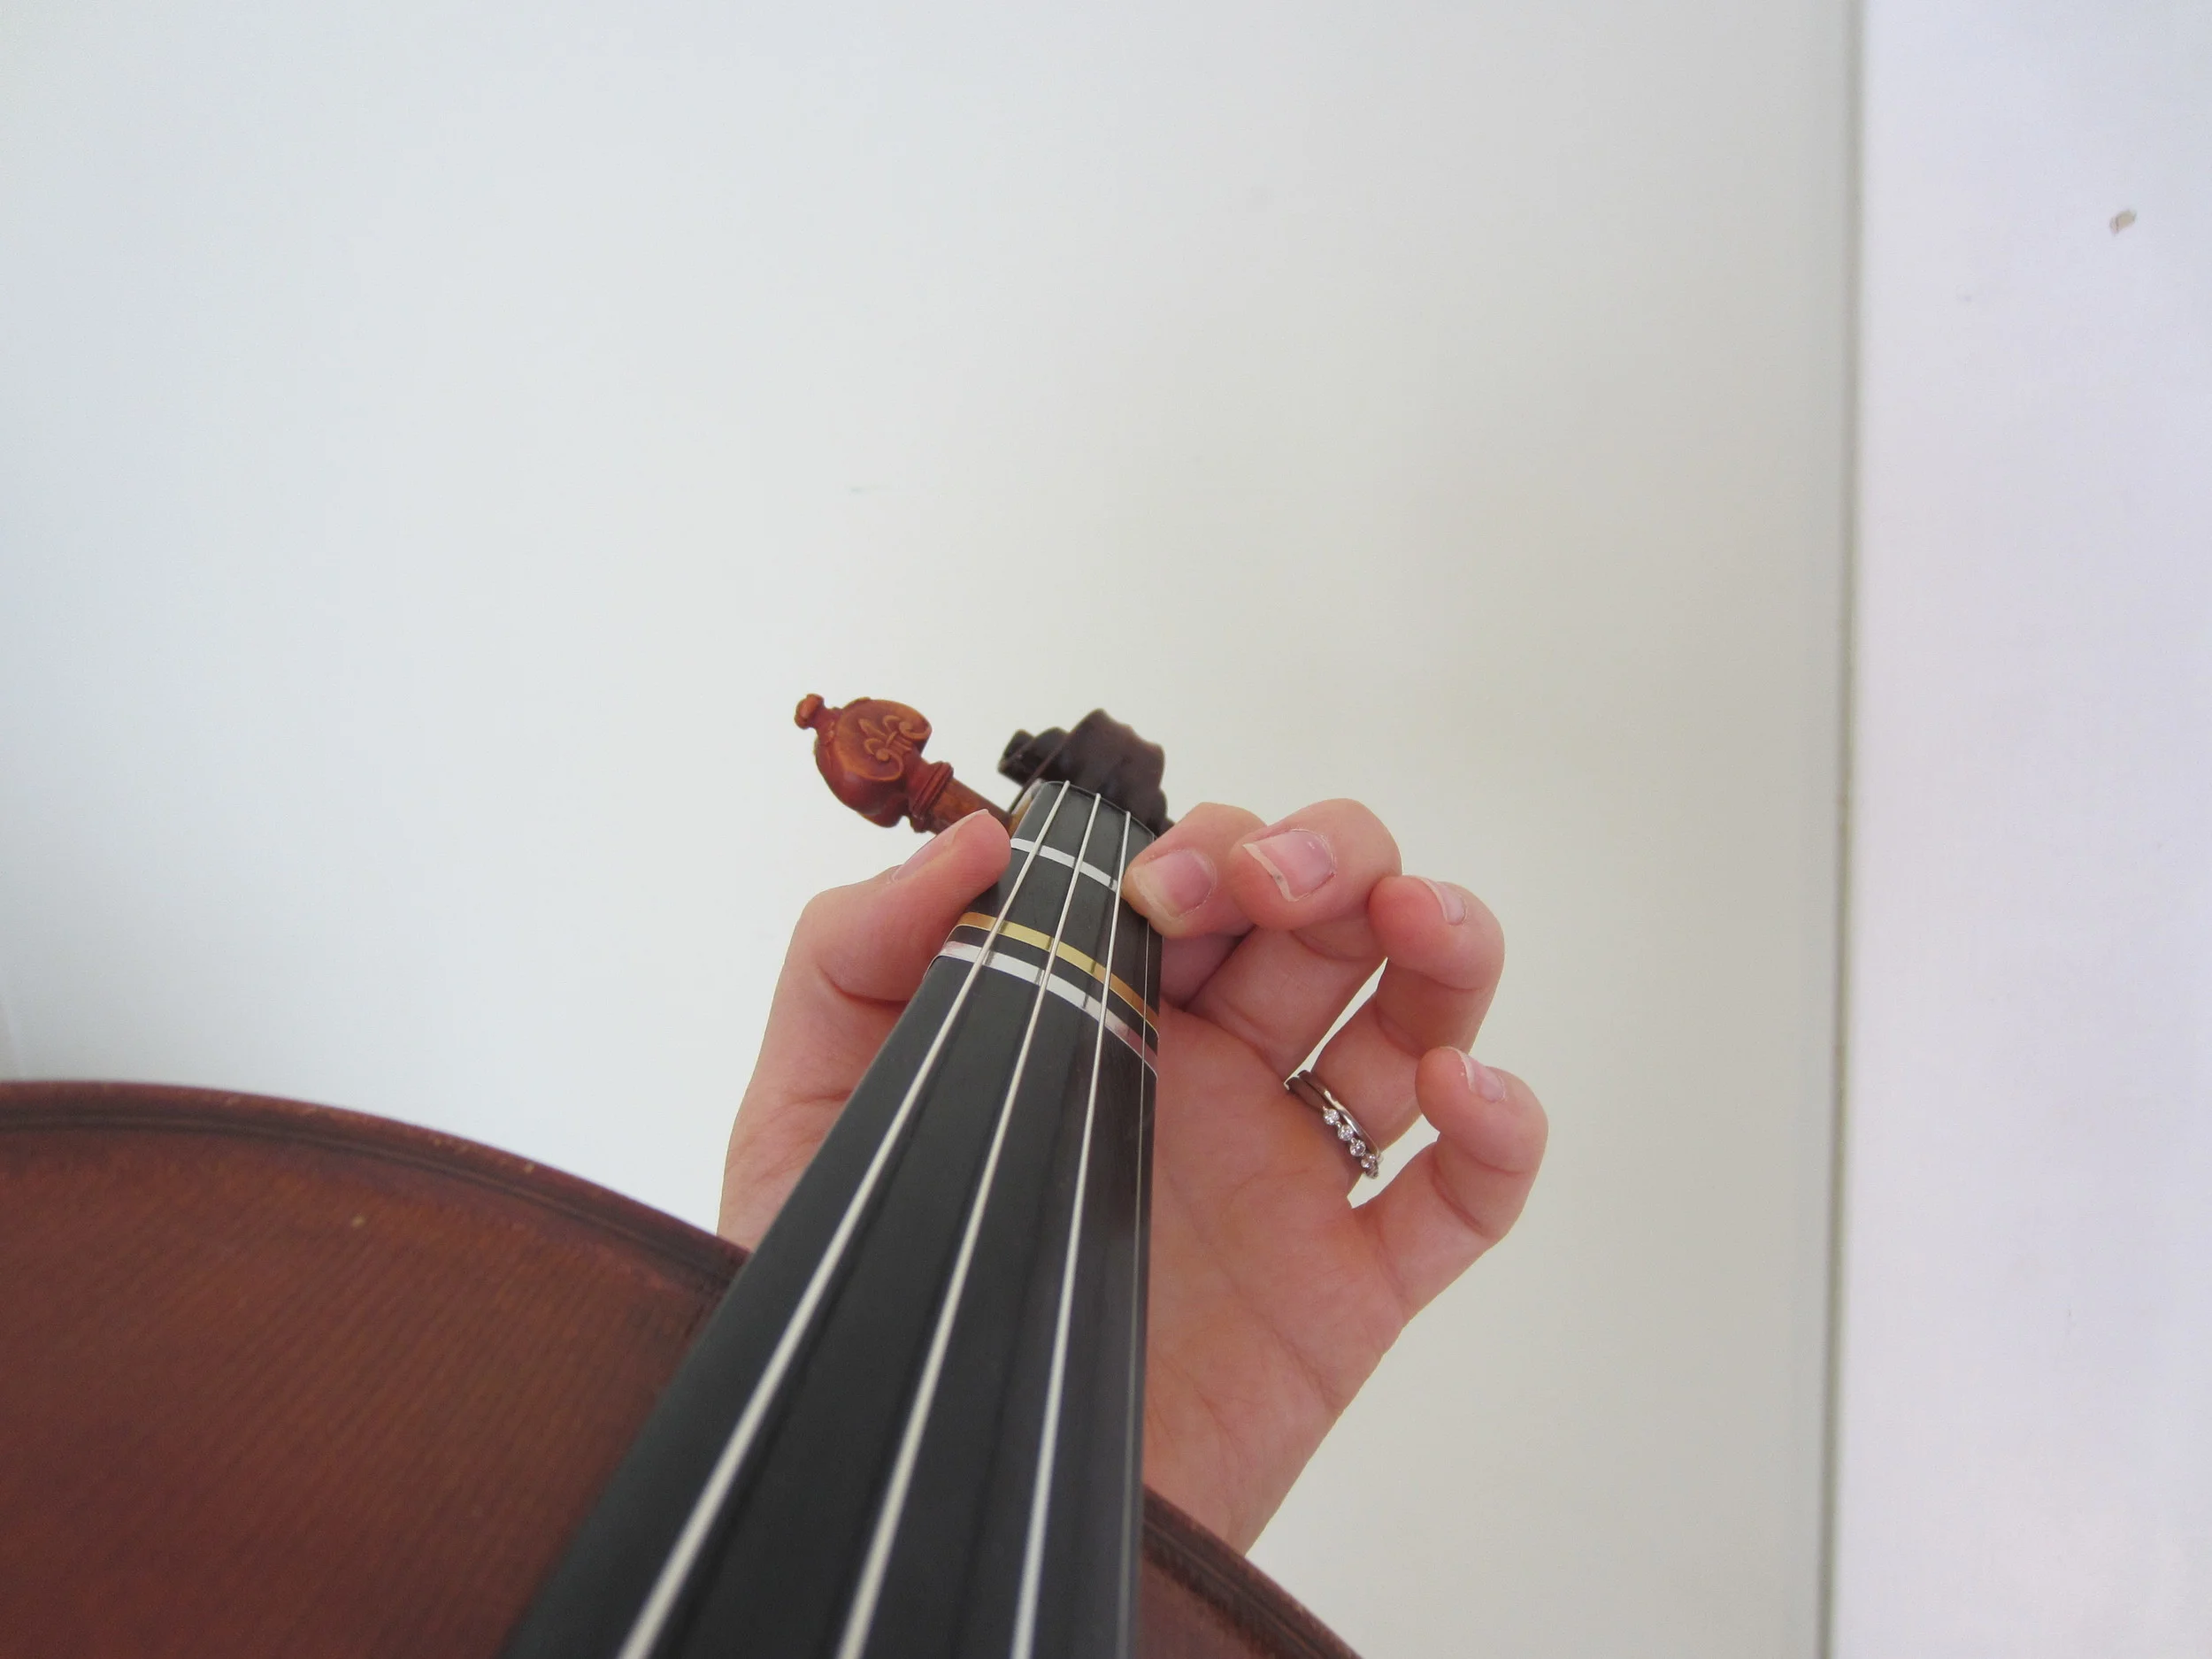
Good example of the left thumb. Keep it soft on the neck, curved at the middle knuckle.

This is a good example of left hand fingers and thumb, curved around the shape of the neck, ready to play.
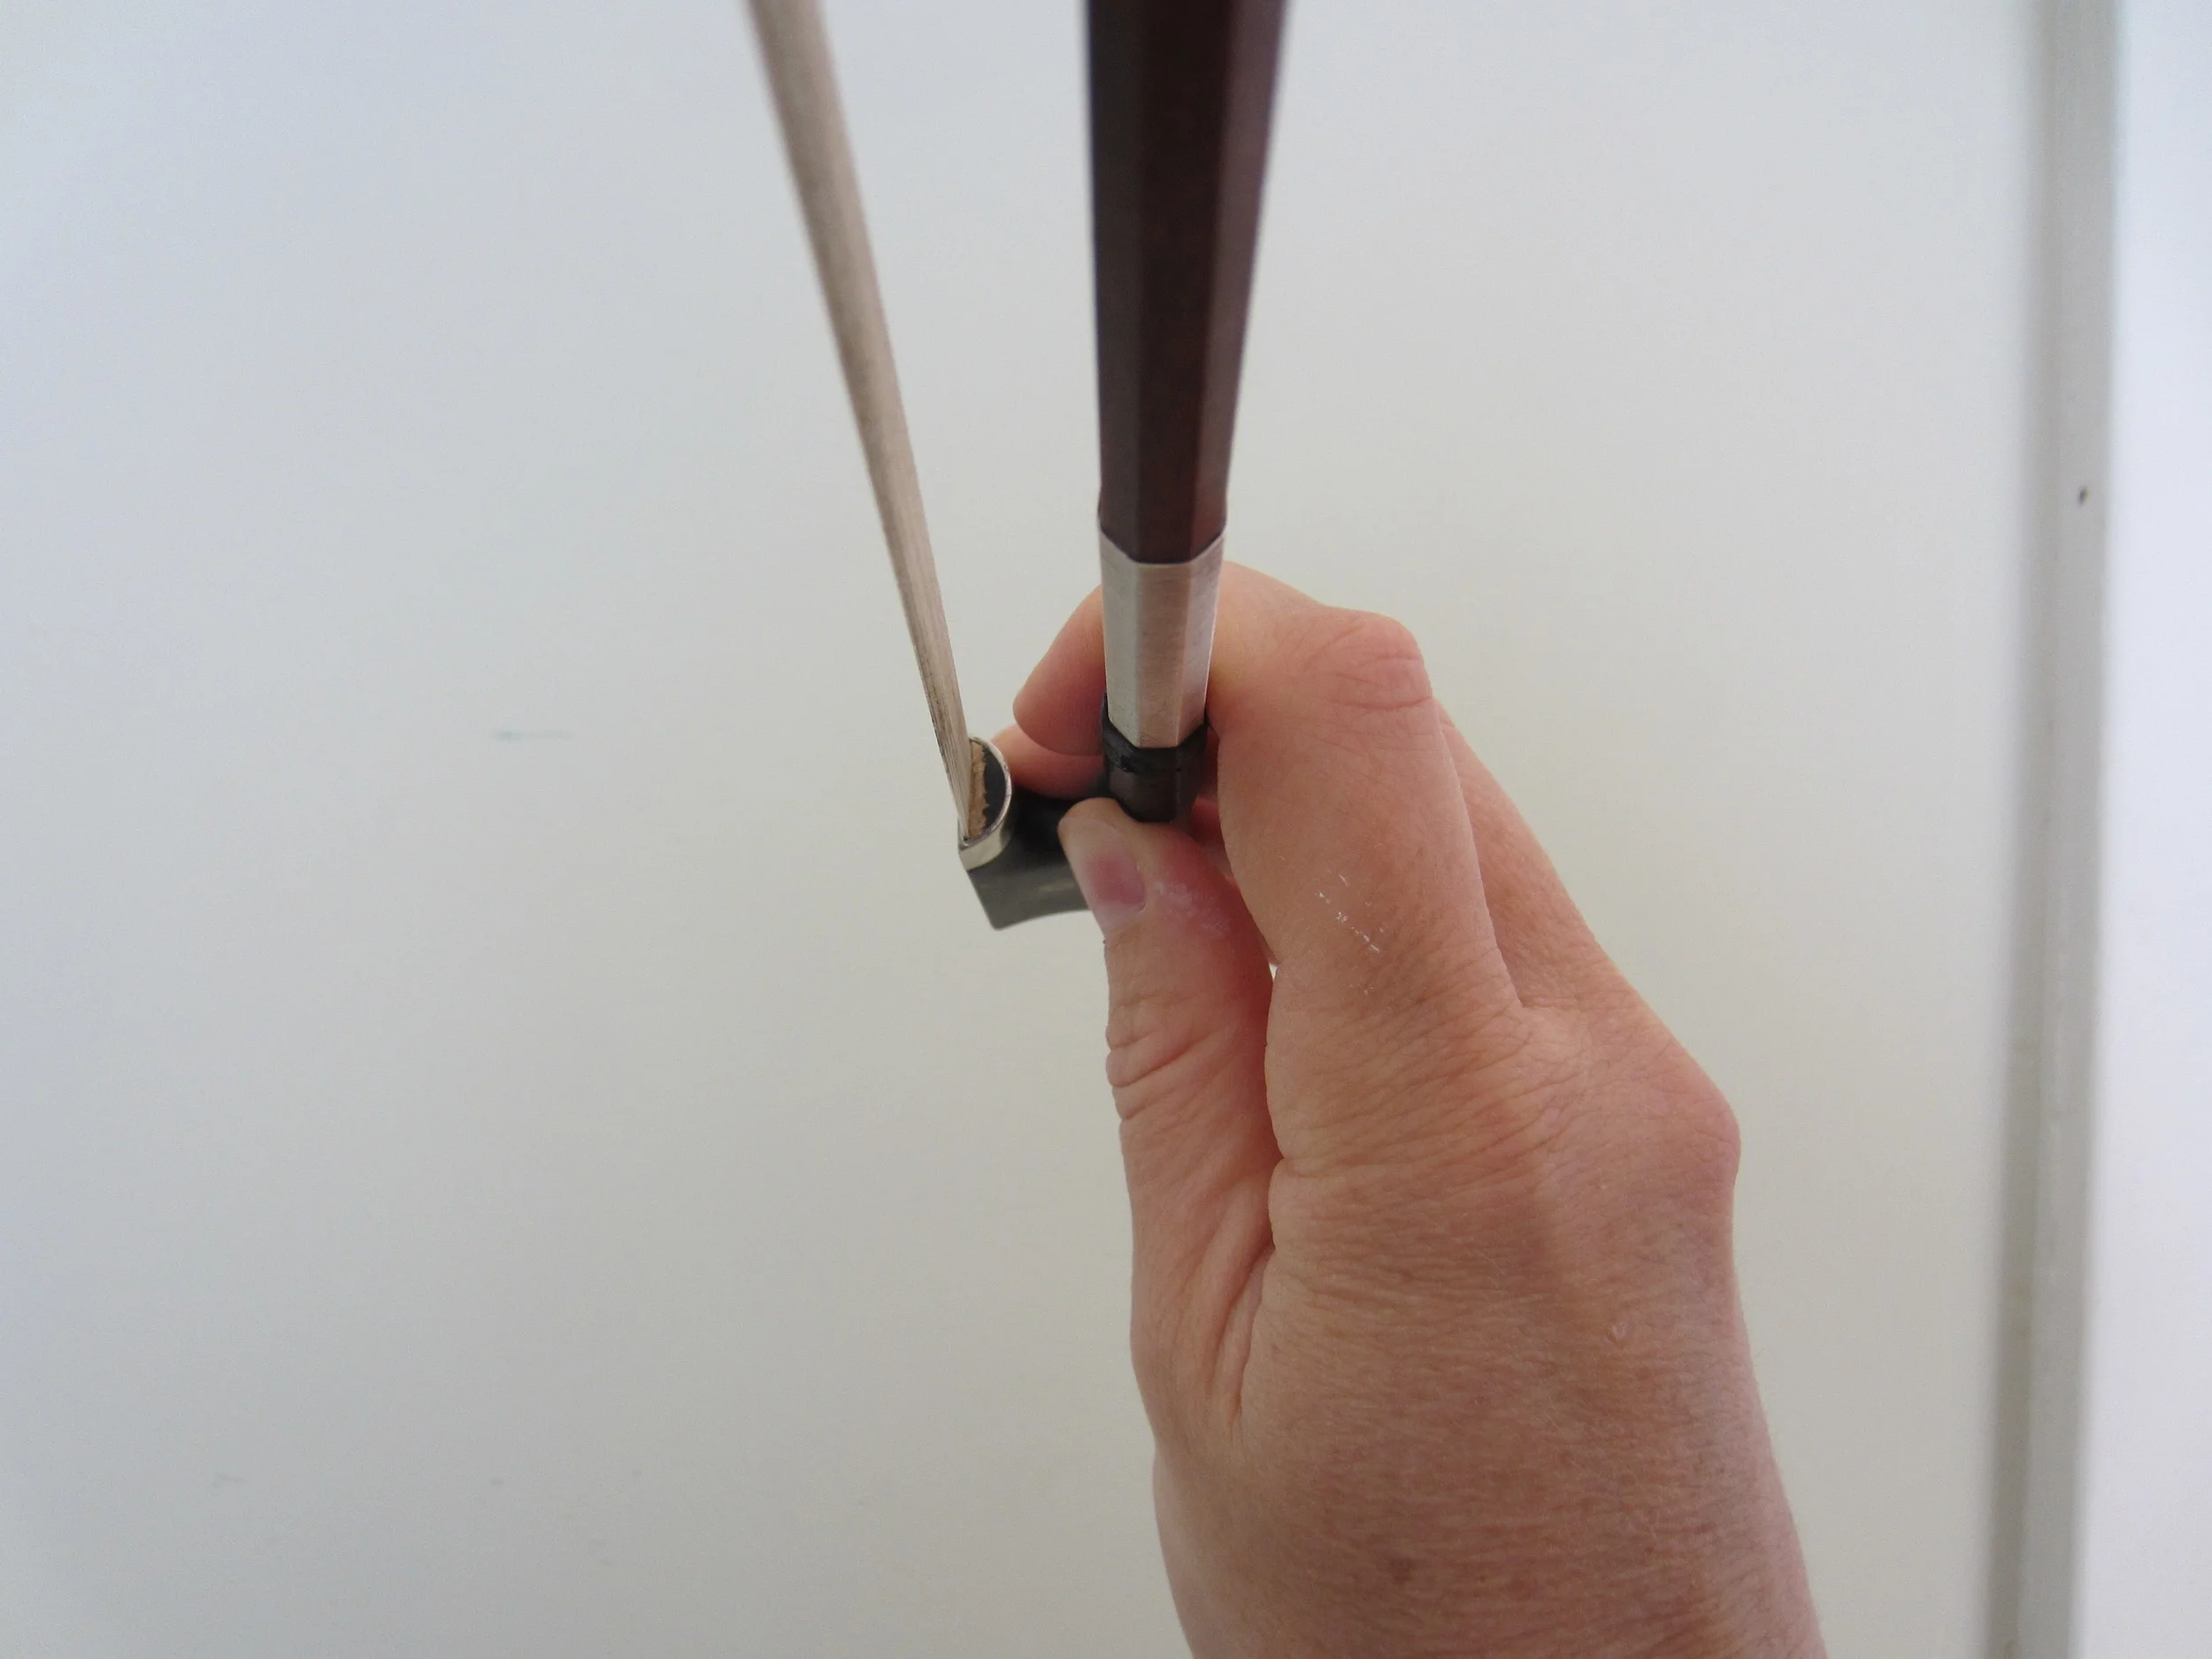
This is a bad example of the right hand thumb. Do not straighten the middle knuckle of the thumb. You're hand should create a tunnel.
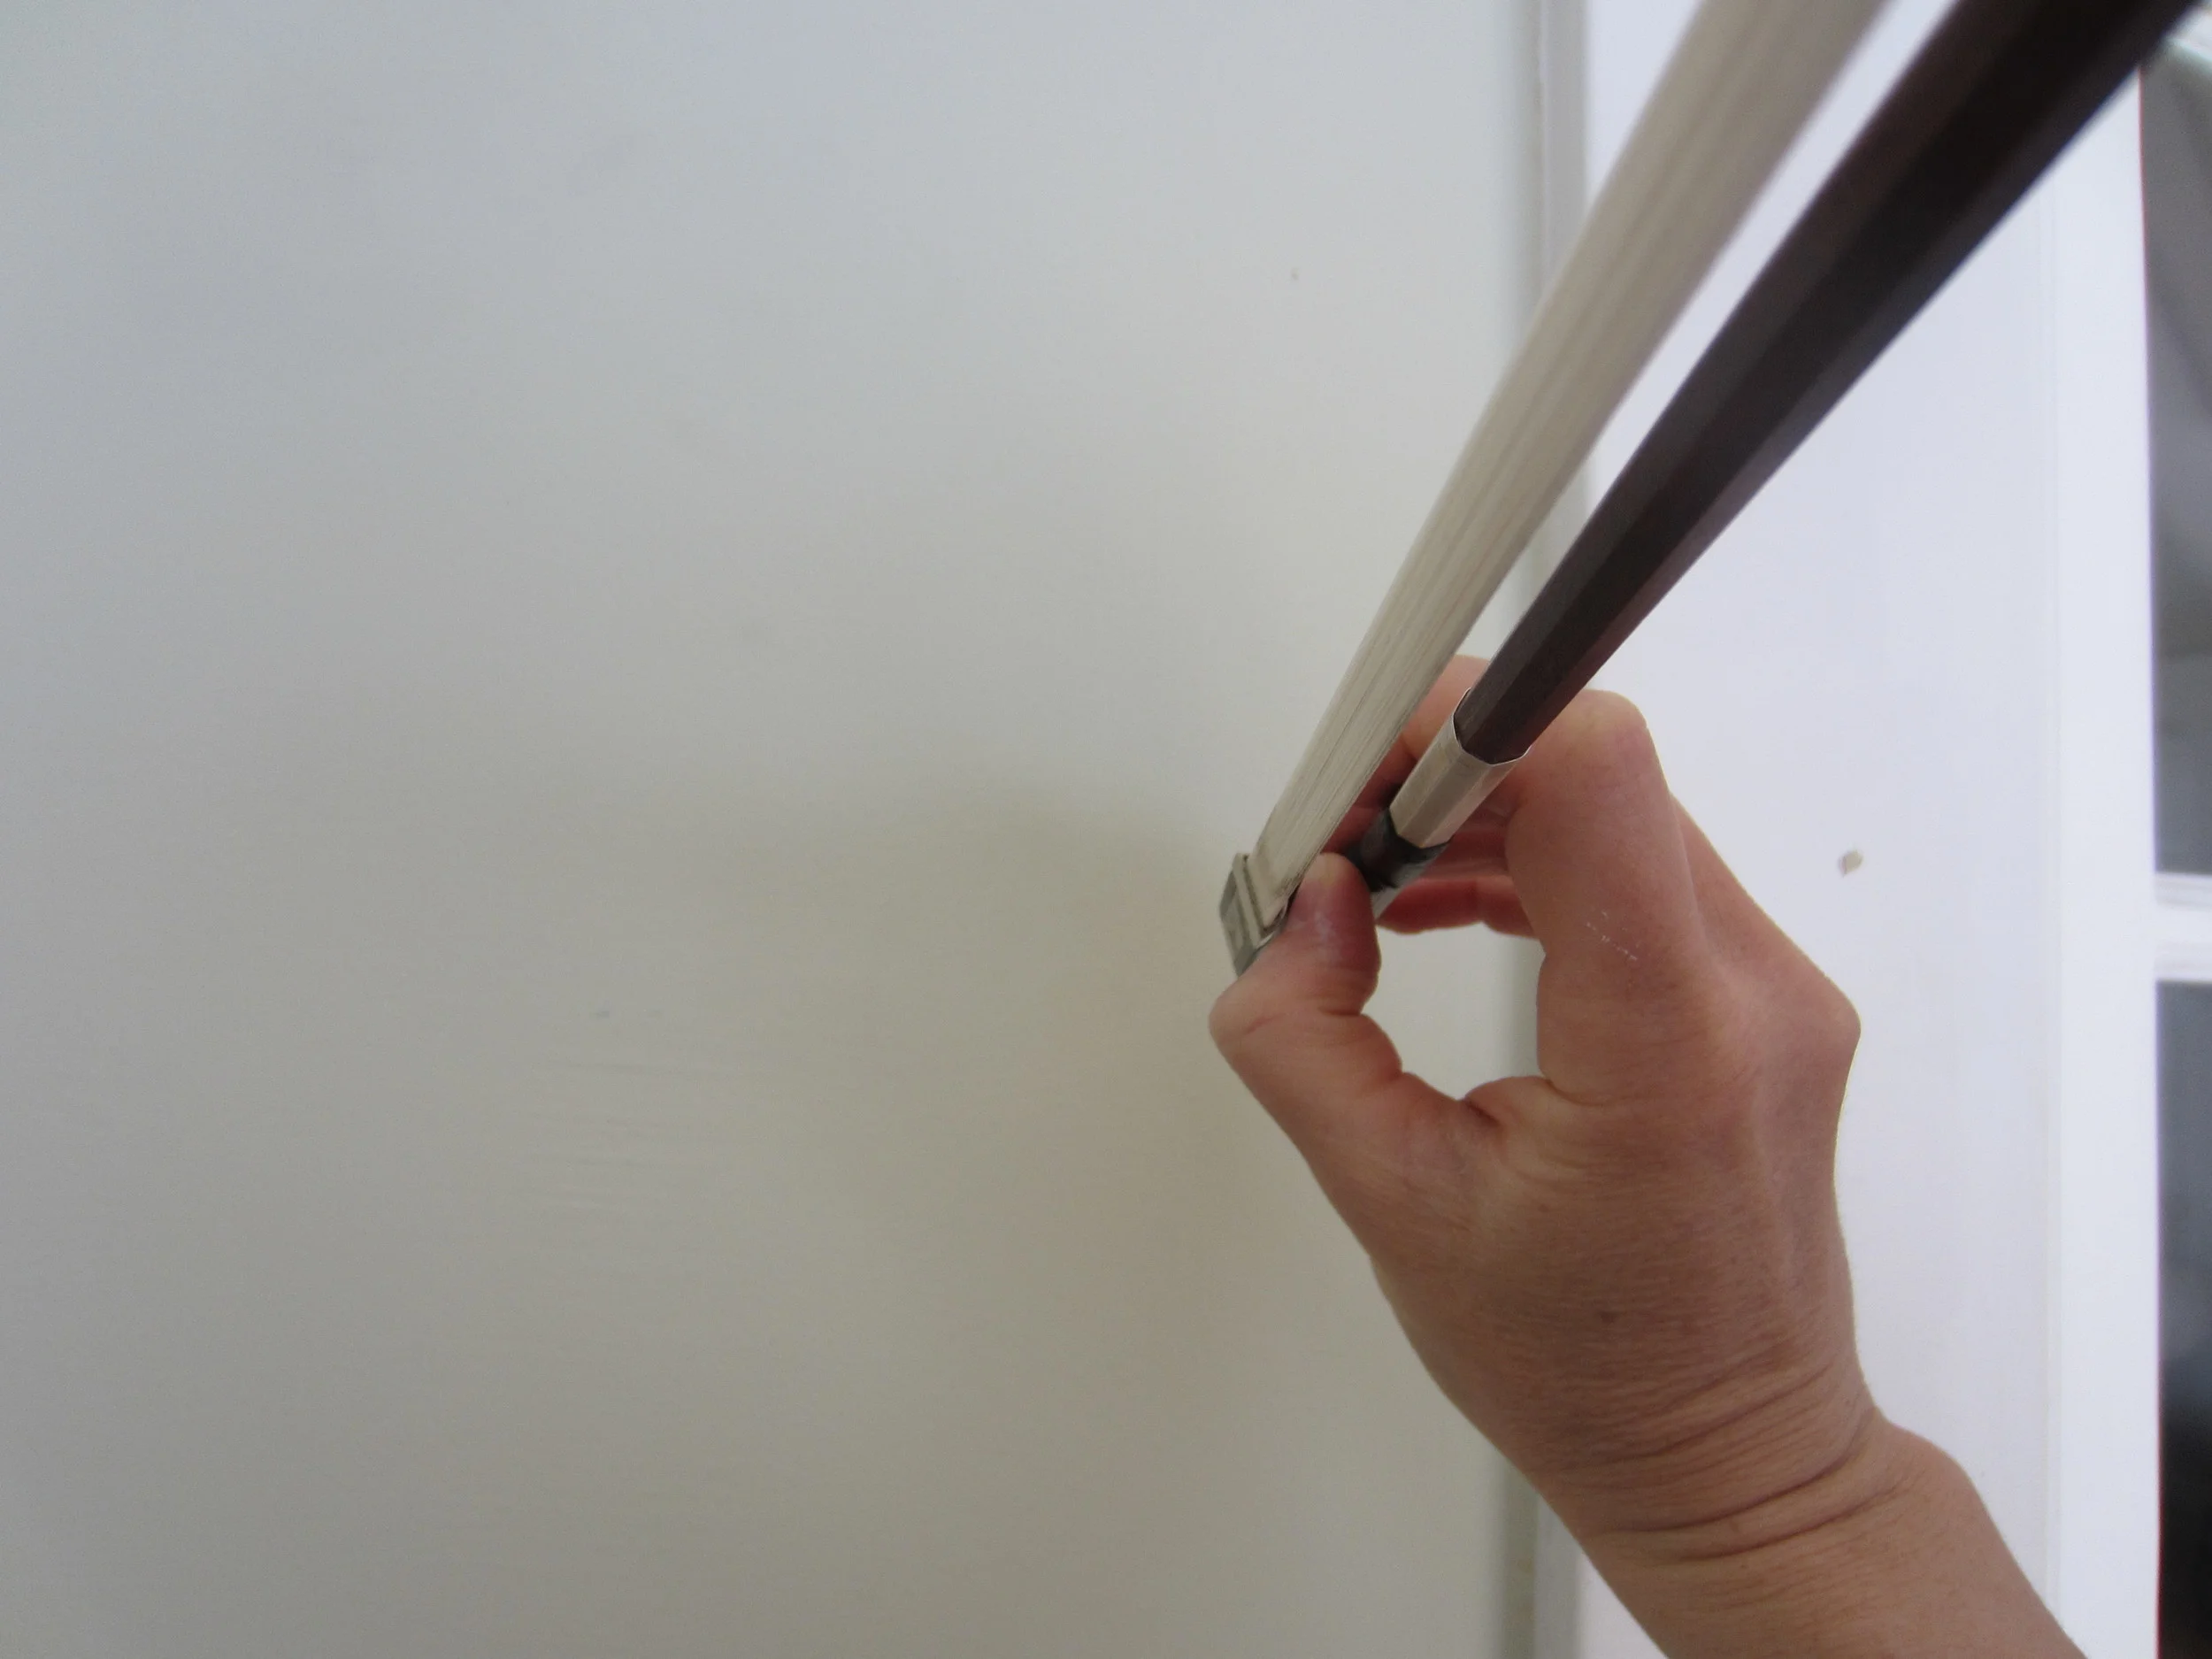
.
This is a good example of the right hand bow hold. See how the fingers and thumb curve to form a tunnel
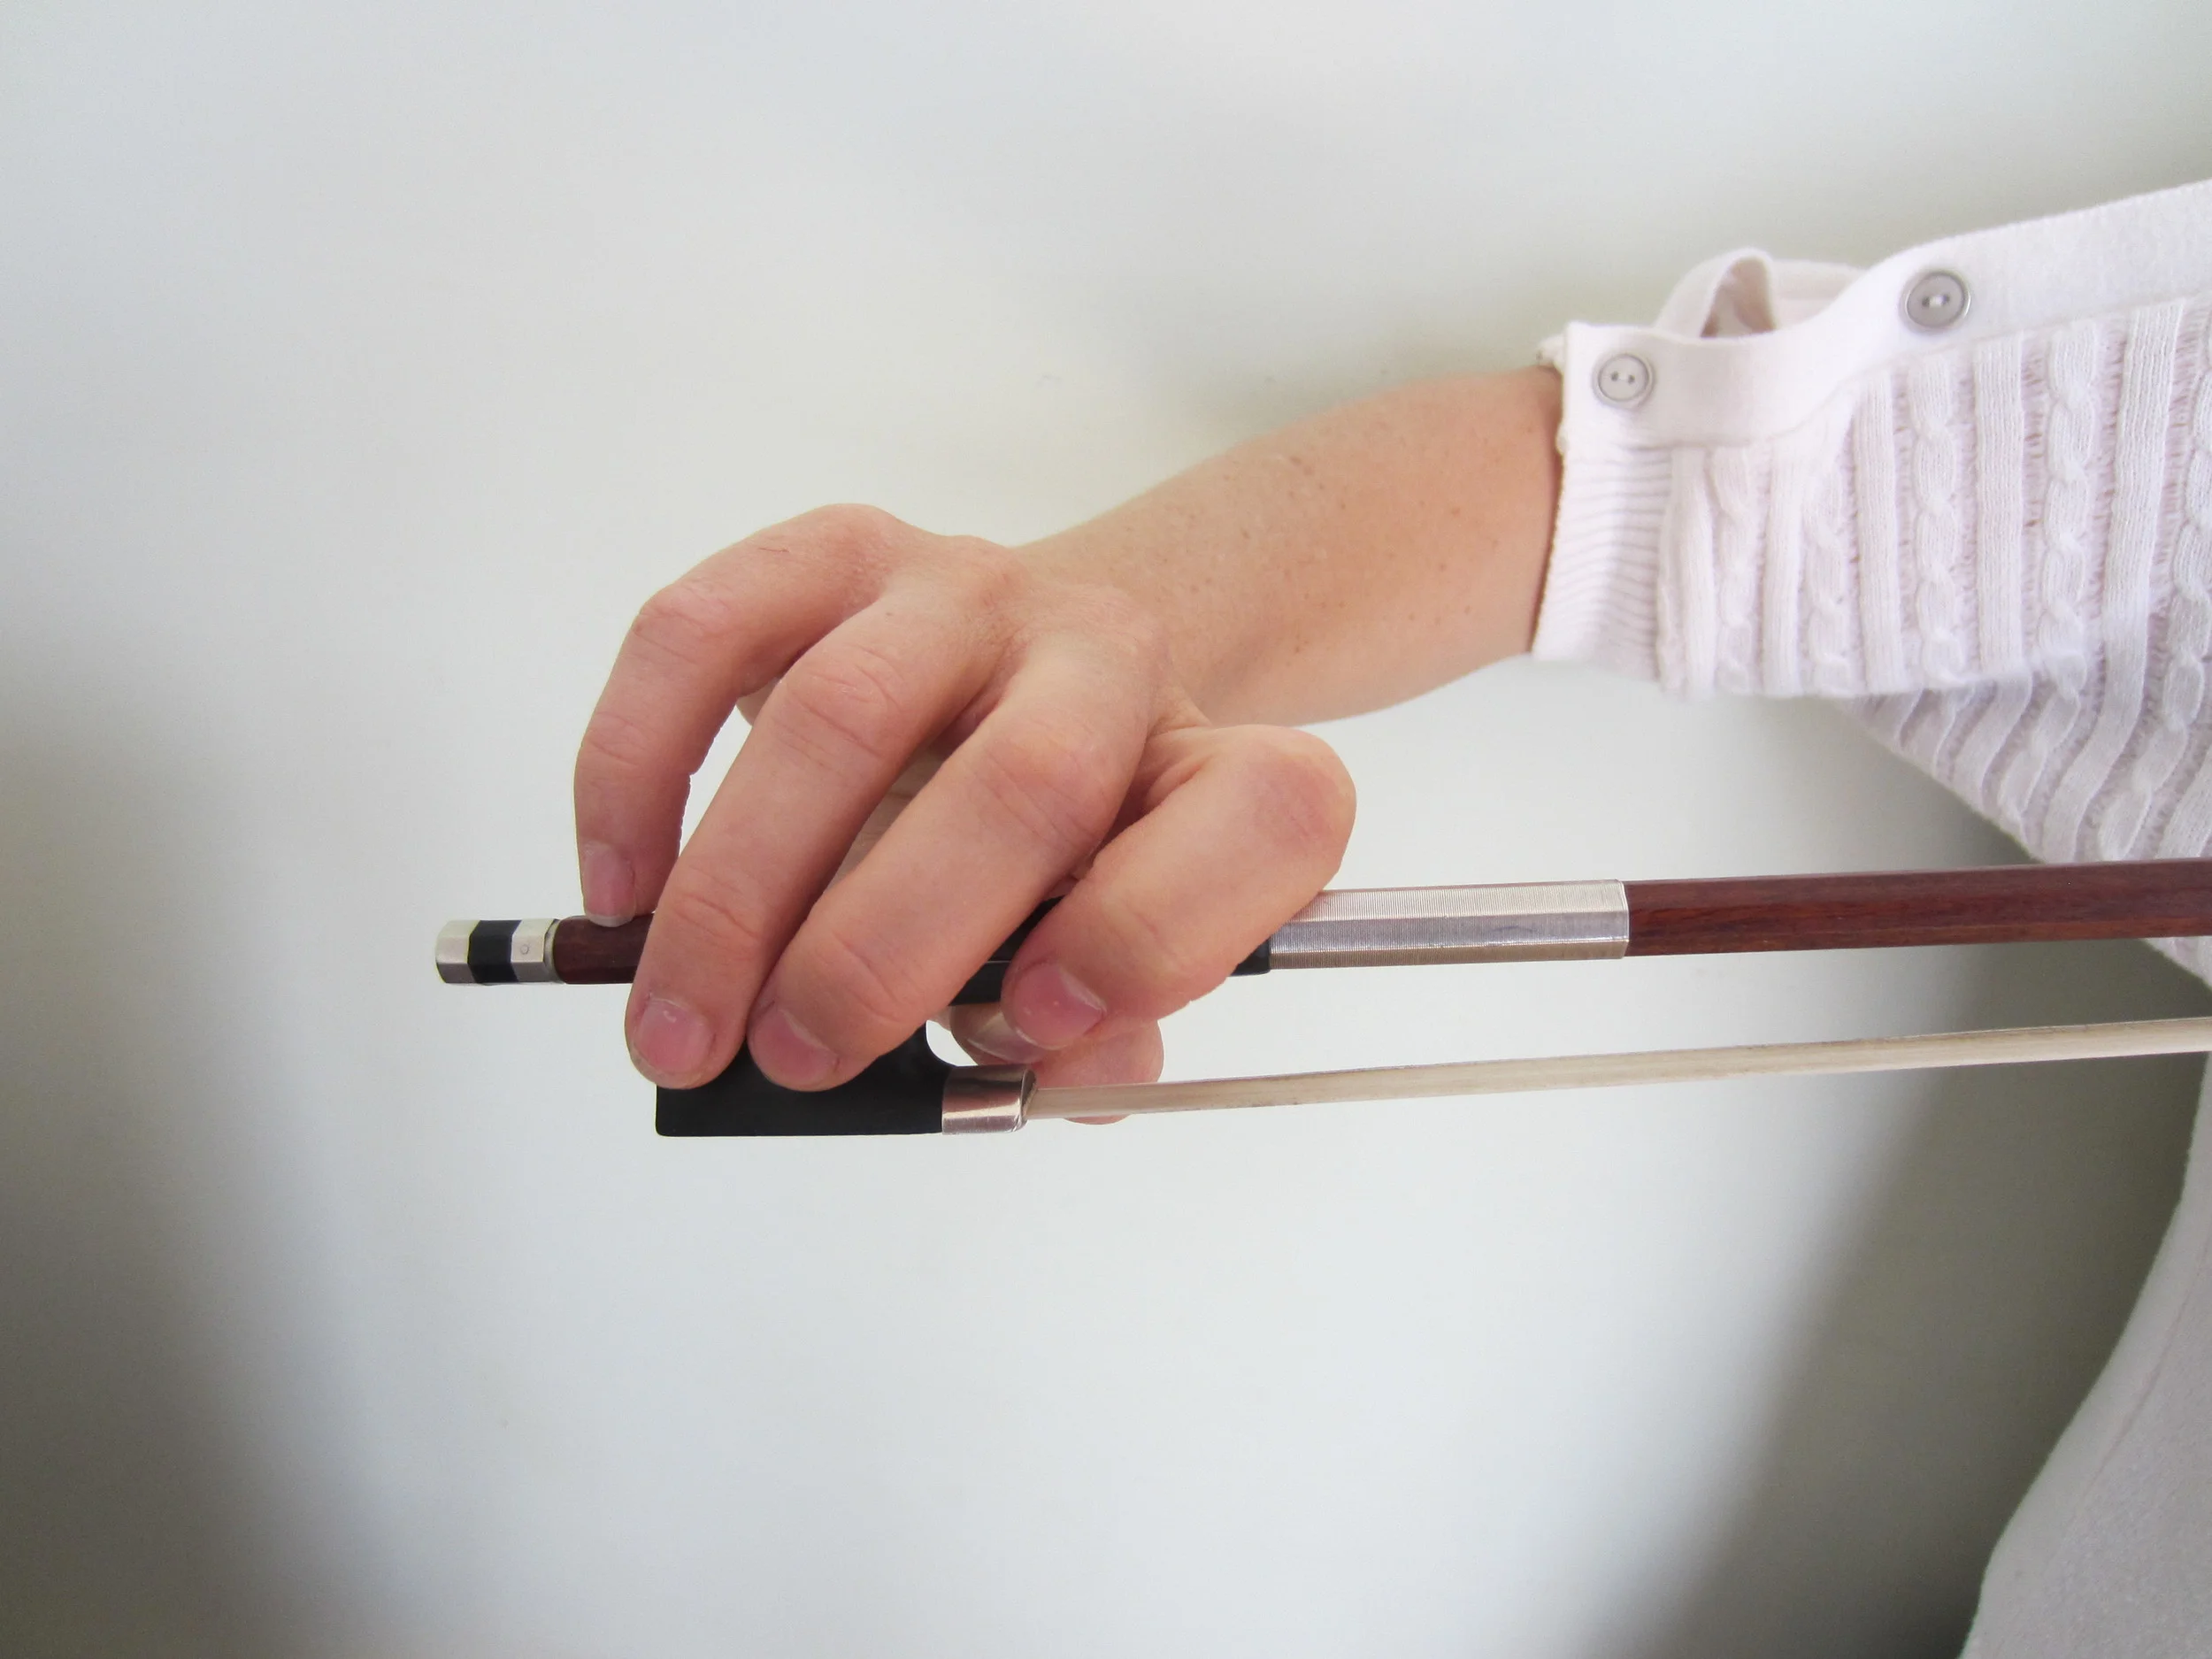
Good bow hold. Lay the index finger down on the bow. The middle two fingers stick together and are buddies. Keep the pinkie soft and curved and contacted to the bow on the tip of the pinkie.

Good violin and bow hold.

Good Position: naturally aligned left wrist, curved right pinkie on the bow.

Good violin hold: check out the right wrist when the bow is being played at the tip.


Learning Violin Tips
Learning violin is a little like learning to use a computer. You won't get very far if you're using your elbow to direct the mouse, or the palm of your hands to type instead of the tips of your fingers. How you hold the violin is the most important aspect of good playing. It will make ALL the difference in how you sound, how fast you can play, and how well you can vibrato, shift, and do double stops.
Take Note: Just because it feels right doesn't mean it is right. The flipside of that statemebont is also true; just because it feels wrong doesn't mean your necessarily doing it incorrectly.
Tip: Correct violin position does not always feel second nature. If it feels slightly uncomfortable it's probably because you are used to doing it a different way. Keep trying the correct way of holding the violin and after a while you'll never want to do it any other way! (Note; Pain and discomfort are two different things. If you feel pain STOP what you are doing, evaluate the problem, and ease into correct way.)
Take Note Becoming aware of how you are holding your violin will make you notice EVERYONE'S violin positioning. You are a violin-holding-critic in the making!
Tip: As you attend concerts or go to violin lessons watch the masters and your teacher carefully. Learn from them, watch how they hold their bow and their violin. Try using their techniques next time you practice.
Take Note Sometimes, from your point of view, it seems like you are doing everything right.
Tip: Change your point of view! You can learn a lot from having others watch you, or from watching yourself. Practice in front of a mirror or video camera to get it perfect.
Bow Tips
Keep your bow hand relaxed. My teacher (I quote her so much because she was fantastic!) LOVED it when her students would drop their bow during their lesson. She said that it meant our hands were as relaxed as they should be.
Spread your fingers evenly over the top of the bow stick. Even though the thumb is curved under, it should also be relaxed.
You are not holding the bow up by how tight your muscles are clenched; you are holding it up by the counter pressure of the thumb on bottom and the fingers on top.
To play an "up" bow start with the tip of the bow on the strings and the elbow, arm, and wrist dropped. As you push the bow up towards the frog, keep the elbow and arm as low as possible while raising the wrist.
To play a "down" bow start with the frog on the strings and the elbow and arm dropped, but the wrist raised. As you pull down on the bow, drop your wrist down. Keep the bow straight!


